
-
-
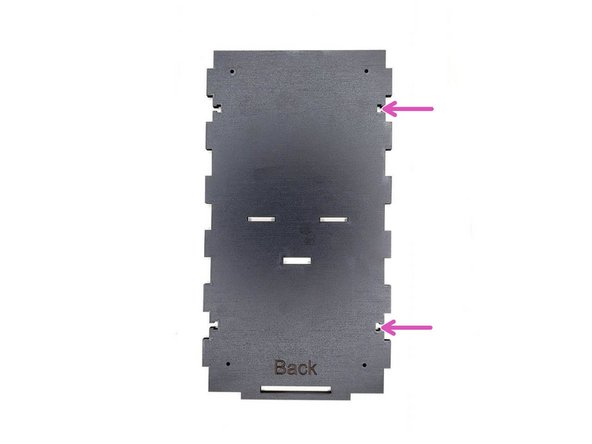
Base
-
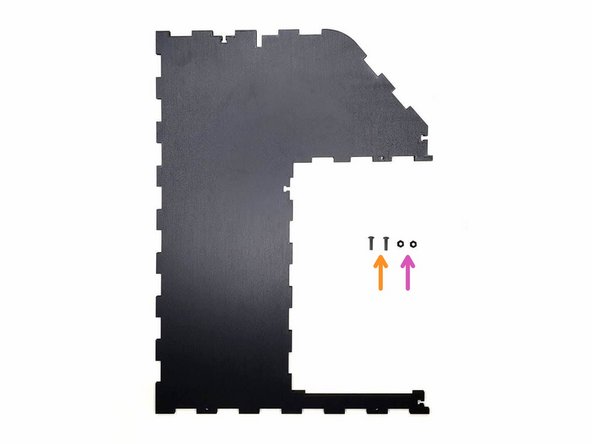
Right side panel
-
Screws M3 10mm (Black) (2x)
-
M3 Nuts (2x)
-
-
-
Take the base and insert two M3 nuts.
-
In case you can't press the nuts in, don't use excessive force. Rotate the nut until it falls in place.
-
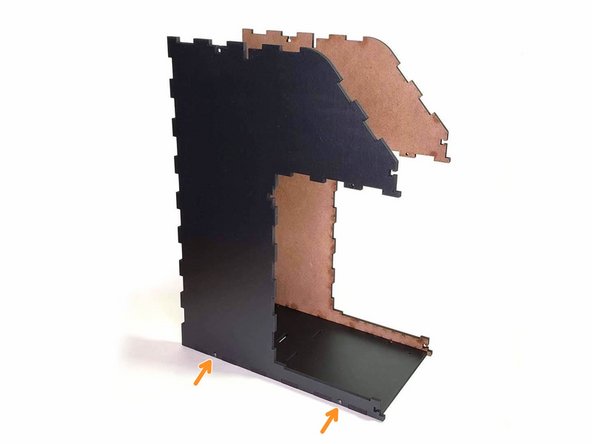
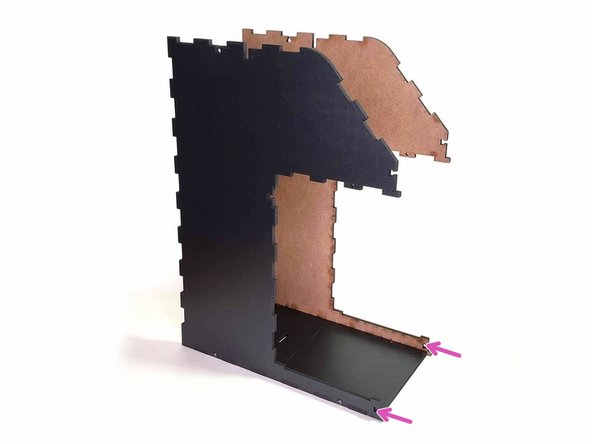
Connect the base with the right side panel.
-
Insert the M3 10mm screws through both holes in the right side. Start tightening until you reach the M3 nut. Tighten both screws all the way.
-
-
-
Left side panel
-
Screws M3 10mm (Black) (2x)
-
M3 Nuts (2x)
-
-
-
Take the base and insert two M3 nuts.
-
In case you can't press the nuts in, don't use excessive force. Rotate the nut until it falls in place.
-
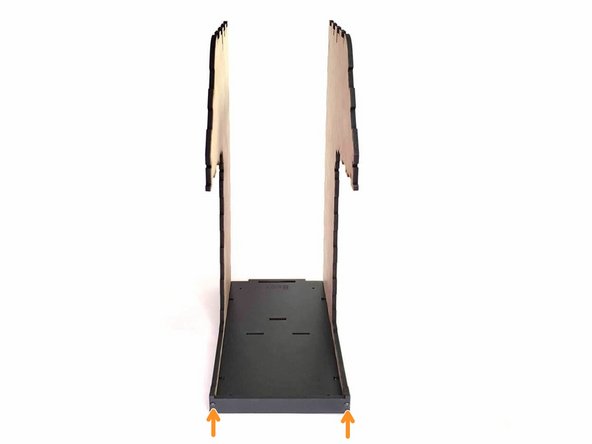
Connect the base with the left side panel.
-
Insert the M3 10mm screws through both holes in the right side. Start tightening until you reach the M3 nut. Tighten both screws all the way.
-
-
-
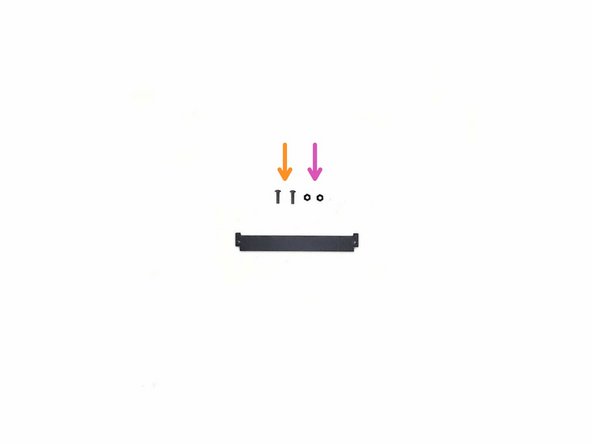
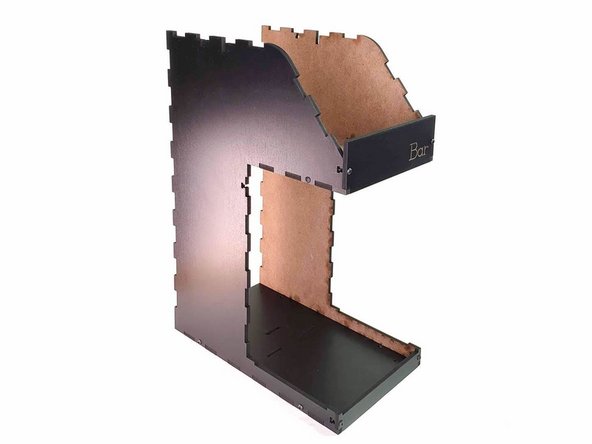
Bottom front panel
-
Screws M3 10mm (Black) (2x)
-
M3 Nuts (2x)
-
-
-
Take the left side panel and the right side panel and insert the two M3 nuts.
-
In case you can't press the nuts in, don't use excessive force. Rotate the nut until it falls in place.
-
Connect the left side panel and the right side panel with the bottom front panel.
-
Insert the M3 10mm screws through both holes in the right side. Start tightening until you reach the M3 nut. Tighten both screws all the way.
-
-
-
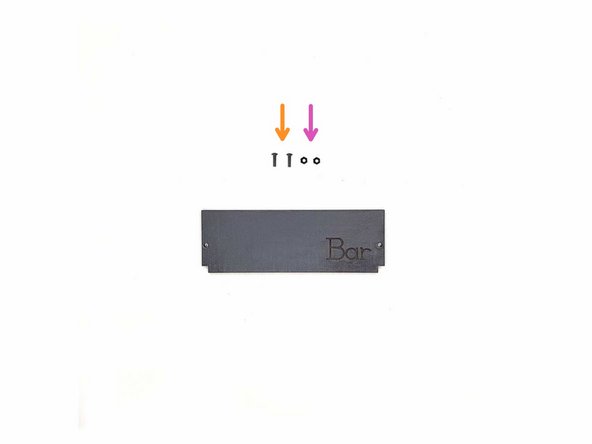
Top front panel
-
Screws M3 10mm (Black) (2x)
-
M3 Nuts (2x)
-
-
-
Take the left side panel and the right side panel and insert the two M3 nuts.
-
In case you can't press the nuts in, don't use excessive force. Rotate the nut until it falls in place.
-
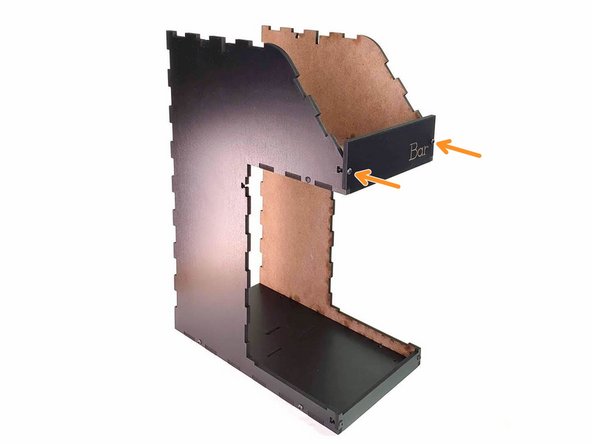
Connect the left side panel and the right side panel with the top front panel.
-
Insert the M3 10mm screws through both holes in the right side. Start tightening until you reach the M3 nut. Tighten both screws all the way.
-
-
-
This step is done, great job!
-
Ready for more? Lets move to 4. Distance sensor and Rubber Pads
-


Cancel: I did not complete this guide.
One other person completed this guide.

4 Comments
My kit needed a different order of assembly. Step 8 of this section should be done after the installation of the acrylic in the 4th part of the instructions
Dave@innonavi.com - Resolved on Release Reply
Thanks for pointing that out! I noticed, the picture in Step 8 is confusing because it looks like the panel on the bottom is there too, but instead, it should be placed in Step 3 of the following guide.
MyBar.io -
Should have link to next step.
And why are pictures so small for steps 5,7, and 9? Why not fill the space?
Dave@innonavi.com - Resolved on Release Reply
This is to preserve the perspective and not make it seam like these are more prominent pieces.
MyBar.io -